简介
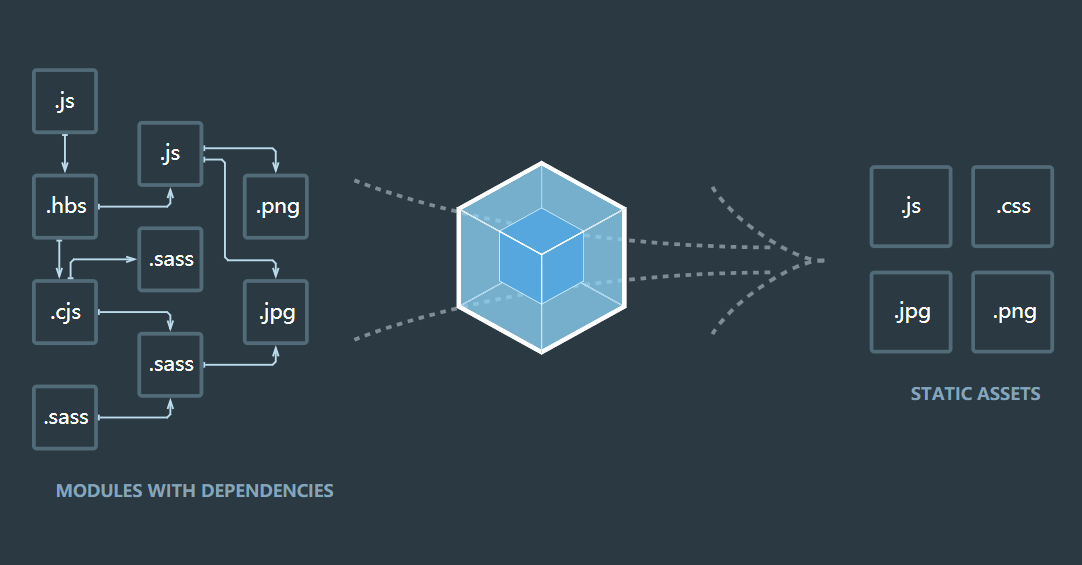
Vue (读音 /vjuː/,类似于 view) 是一套用于构建用户界面的渐进式框架。与其它大型框架不同的是,Vue 被设计为可以自底向上逐层应用。Vue 的核心库只关注视图层,不仅易于上手,还便于与第三方库或既有项目整合。另一方面,当与现代化的工具链以及各种支持类库结合使用时,Vue 也完全能够为复杂的单页应用提供驱动。本篇文章记录不使用 vue-cli 的自动化功能,手动搭建一个 Vue 的开发环境。
环境
| 软件 | 版本 |
|---|---|
| 操作系统 | Windows 10 |
| Node.js | v10.13.0 |
| Chrome浏览器 | 70 |
步骤
初始化项目目录
创建一个空的目录作为项目目录,并在目录内执行 npm init --yes
D:\Workspace\webapp>npm init --yes
Wrote to D:\Workspace\webapp\package.json:

{
"name": "webapp",
"version": "1.0.0",
"description": "",
"main": "index.js",
"scripts": {
    "test": "echo \"Error: no test specified\" && exit 1"
},
"keywords": [],
"author": "",
"license": "ISC"
}
并创建新目录 src 作为代码的存放目录。在 src 目录中创建 index.html 写入以下内容:
1 |
|
加速 npm 包下载
默认的 npm 非常连接官方的 npm 源,下载速度非常慢,可以使用 cnpm 来加速下载。
首先全局安装 cnpm1
npm install -g cnpm --registry=https://registry.npm.taobao.org
之后就可以使用 cnpm 来开心的下载 npm 包了,但是 cnpm 下载某些包会出现依赖无法完全解决的问题,导致包无法正常使用,这种情况就只好配合 npm 来使用了。
还有一种加速 npm 包下载的方法,就是让默认的 npm 命令使用国内的 npm 镜像站。可以注意到,上一条安装 cnpm 的命令中,就使用了 --registry=https://registry.npm.taobao.org 临时将下载源切换到 taobao 提供的 npm 镜像站。这里使用 nrm 工具来切换镜像站,nrm 工具也需要先使用 npm 来安装。
1 | npm install -g nrm --registry=https://registry.npm.taobao.org |
nrm ls 命令可以看到当前默认使用的是 npm 的官方源
D:\Workspace\webapp>nrm ls

* npm ---- https://registry.npmjs.org/
cnpm --- http://r.cnpmjs.org/
taobao - https://registry.npm.taobao.org/
nj ----- https://registry.nodejitsu.com/
rednpm - http://registry.mirror.cqupt.edu.cn/
npmMirror  https://skimdb.npmjs.com/registry/
edunpm - http://registry.enpmjs.org/
使用 nrm use taobao 将默认源切换到 taobao 提供的镜像站
D:\Workspace\webapp>nrm use taobao

Registry has been set to: https://registry.npm.taobao.org/

D:\Workspace\webapp>nrm ls

npm ---- https://registry.npmjs.org/
cnpm --- http://r.cnpmjs.org/
* taobao - https://registry.npm.taobao.org/
nj ----- https://registry.nodejitsu.com/
rednpm - http://registry.mirror.cqupt.edu.cn/
npmMirror  https://skimdb.npmjs.com/registry/
edunpm - http://registry.enpmjs.org/
搭建 webpack 开发环境
安装 webpack
Vue 官方推荐的开发方式是配合 webpack 打包工具,那么首先把 webpack 环境搭建起来。
1 | cnpm install webpack webpack-cli --save-dev |
webpack3 中,webpack和它的命令行工具都包含在一个包中,但在 webpack4 中,官方将两者分开了,所以必须两个包都安装才可以使用 webpack 命令。官方推荐局部安装 webpack ,直接输入 webpack 命令是没法找到的,高版本的 node.js 可以使用 npx 命令来执行 webpack,或者直接使用相对路径执行 webpack。
D:\Workspace\webapp>webpack -v
'webpack' 不是内部或外部命令,也不是可运行的程序
或批处理文件。

D:\Workspace\webapp>npx webpack -v
4.28.0

D:\Workspace\webapp>node_modules\.bin\webpack -v
4.28.0
使用 webpack 打包
接下来在 src 目录下编写一个 main.js,文件内容如下:
1 | let app = document.getElementById("app") |
将 main.js 打包为 bundle.js,我们一般将打包后的文件单独放到 dist 目录下:
1 | npx webpack src\main.js -o dist\bundle.js --mode development |
D:\Workspace\webapp>npx webpack src\main.js -o dist\bundle.js --mode development
Hash: 8a16b3a0c76c2b1d9f8a
Version: webpack 4.28.0
Time: 94ms
Built at: 2018-12-20 22:58:15
    Asset      Size  Chunks             Chunk Names
bundle.js  3.85 KiB    main  [emitted]  main
Entrypoint main = bundle.js
[./src/main.js] 82 bytes {main} [built]
如果不加上 --mode development,webpack 则默认使用 production 级别去打包,如果代码里有 console.log 等无关程序运行逻辑的代码都会被清理掉,这样不方便项目的调试。这时可以看到项目目录下多出来一个 dist 目录,目录中有一个打包好的 bundle.js。这个例子中并没有在 main.js 里引入第三方的文件,如果引入了,webpack 也会一并打包为一个 bundle.js。
在 index.html 里引入打包好的 bundle.js:1
2
3
4<body>
<div id="app"></div>
<script src="../dist/bundle.js"></script>
</body>
浏览器查看效果:

webpack 配置文件
用命令行的方式是非常不方便,如果关闭了终端,下次使用 webpack 编译代码就还需要输入长长的一串代码,我们可以将代码写入到 webpack 的配置文件中,并配合 package.json 提供的自定义脚本命令功能来实现方便的编译。
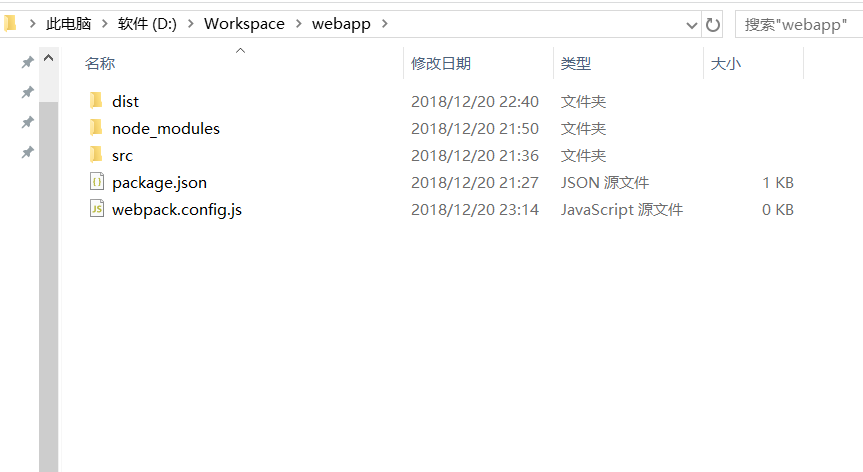
与 package.json 同级的目录下创建 webpack.config.js 文件,当前项目目录下为:
webpack.config.js 里写入如下内容:
1 | const path = require('path') |
代码语法使用 node.js 的语法,并使用 module.exports 将配置暴露出去,其中 entry 表示入口文件,也就是我们的 main.js 所在的目录。output 提供一个输出的目录和打包后的文件名。mode 则是配置使用哪种模式进行打包。之后我们对 webpack 的配置也都是围绕这个文件进行。
这是在命令行只输入 npx webpack 命令,可以看到也编译成功了。
接着修改 package.json,在 scripts 项中添加 "build": "webpack",这里就不需要借助 npx 工具来执行 webpack 了,npm 会在合适的位置运行 webpack 命令。
当前 package.json 内容如下:
1 | { |
控制台运行 npm run build
D:\Workspace\webapp>npm run build

> webapp@1.0.0 build D:\Workspace\webapp
> webpack

Hash: 8a16b3a0c76c2b1d9f8a
Version: webpack 4.28.0
Time: 95ms
Built at: 2018-12-20 23:25:53
    Asset      Size  Chunks             Chunk Names
bundle.js  3.85 KiB    main  [emitted]  main
Entrypoint main = bundle.js
[./src/main.js] 82 bytes {main} [built]
预设的命令执行成功了。
webpack-dev-server 配置
每次更改了代码,每次都需要重新编译,并刷新浏览器页面,这样是非常浪费时间的。而且通过文件的方式在浏览器预览效果,后期可能会出现各种问题。webpack-dev-server 则提供了一个支持时时编译,并自动刷新浏览器的功能。
我们首先安装它:
1 | cnpm install webpack-dev-server --save-dev |
webpack-dev-server 也支持直接通过命令行参数启动,但是既然已经使用了 webpack.config.js 来管理配置,那么就不提倡命令行参数启动了。修改 webpack.config.js 内容如下:
1 | const path = require('path') |
我们添加了 devServer 和 plugins 配置项,并导入了一个新的包 webpack。devServer 里配置的三个属性,open 表示自动帮我们打开浏览器,port 表示服务监听在 3000 端口,hot 表示开启热加载功能。热加载功能一个需要注意的地方就是需要在 plugins 里添加这个插件,否则热加载功能是关闭的,所以才有了 new webpack.HotModuleReplacementPlugin() 这段代码。
还有一个需要注意的地方是,使用 webpack-dev-server 时一定要将 mode 设置为 development,否则每次热更新都非常慢,因为编译为 production 是非常耗时且消耗 CPU 资源的,但是可以给打包后的代码带来更小的体积。
接着在 package.json 中添加命令,并修改 build 命令构建 production 级别的代码:
1 | "scripts": { |
控制台输入 npm run dev 命令,可以看到 webpack-dev-server 开始执行了,片刻,浏览器也自动打开了项目的根目录的页面:
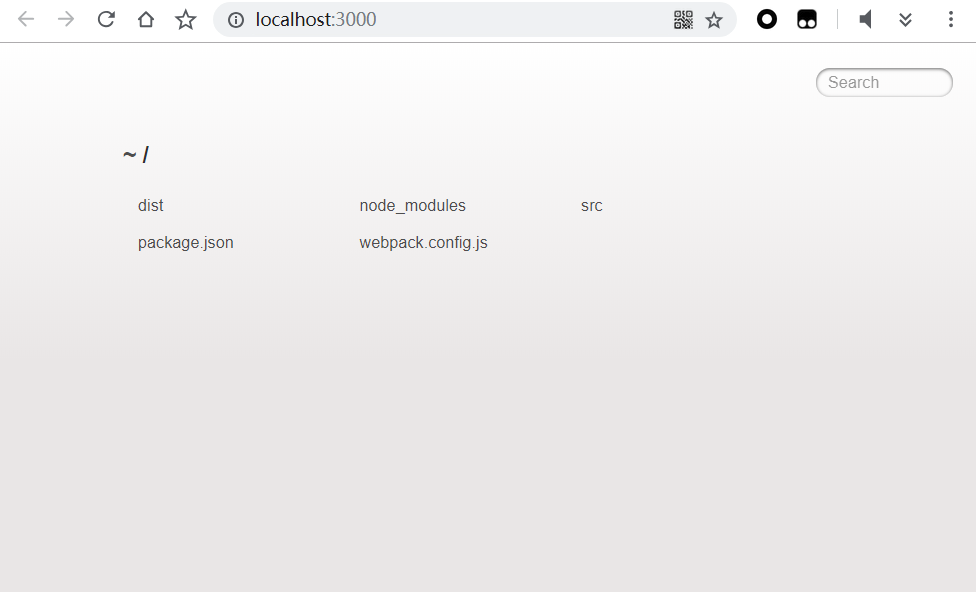
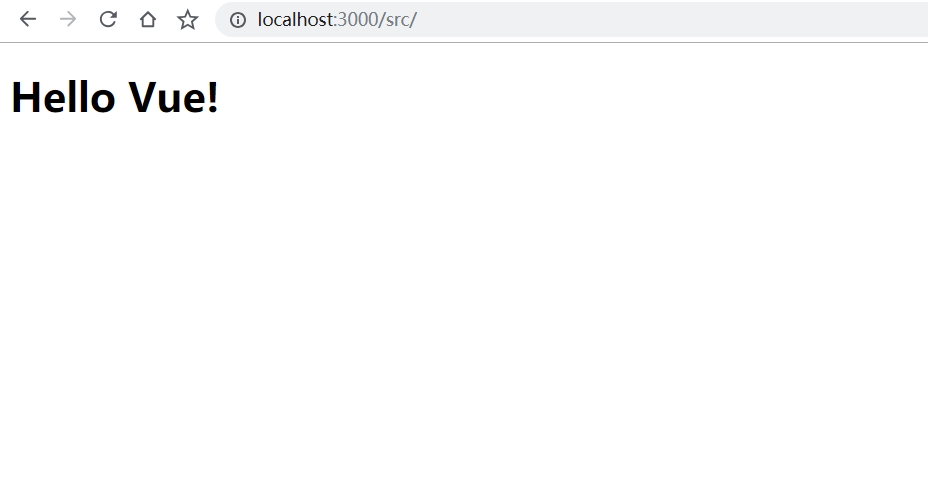
index.html 在 src 目录下,点击 src 目录则打开了先前的页面。修改 main.js 里的内容为如下:
1 | let app = document.getElementById("app") |
可以看到每次对代码 Ctrl + S 保存一次,控制台就多输出一些内容,如果内容有 Compiled successfully. 则表示自动编译成功了,当我们兴高采烈的刷新浏览器时发现,怎么一点变化都没!这是因为 webpack-dev-server 并不是直接将编译后的代码保存在磁盘上,而且放在了内存中。而我们刚才的 index.html 引入的还是之前编译好的 bundle.js 文件。
修改 index.html 将引入 bundle.js 的代码改为 <script src="/bundle.js"></script>,接着重启服务或者刷新浏览器试试:
而且每次修改了 main.js 后都会自动帮我们编译并刷新浏览器。
还有个小问题,webpack-dev-server 每次打开浏览器能不能直接定位到 index.html 而不是我们手动进入 src 目录呢?答案是肯定的,修改 devServer 的属性如下:
1 | devServer: { |
contentBase 会告诉 webpack-dev-server 以哪个目录作为根目录,然后重启 webpack-dev-server 可以看到浏览器自动打开的就是我们希望看到的页面了。
但是。。。当我们自动修改了 main.js 的时候,webpack-dev-server 会自动编译并把它放入内存,而 index.html 依然在物理磁盘上,那么我们能不能把这个文件也放入内存?这时还需要借助一个 html-webpack-plugin 的插件,接下来安装并使用它:
1 | cnpm install html-webpack-plugin --save-dev |
修改 webpack.config.js 为如下内容:
1 | const path = require('path') |
这里我们做了三处更改,首先引入了 html-webpack-plugin 这个插件,然后注释掉了 contentBase: "src",接着初始化了 htmlWebpackPlugin 的对象,并将 index.html 的路径和文件名提供给插件。
还需要修改 index.html 将引入 bundle.js 的代码去掉:
1 |
|
然后重启 webpack-dev-server 可以看到,又打开了熟悉的页面。为什么我们没有引入 bundle.js 还可以正常显示页面呢?打开控制台可以看到,html-webpack-plugin 已经帮我们自动加入这句代码了。
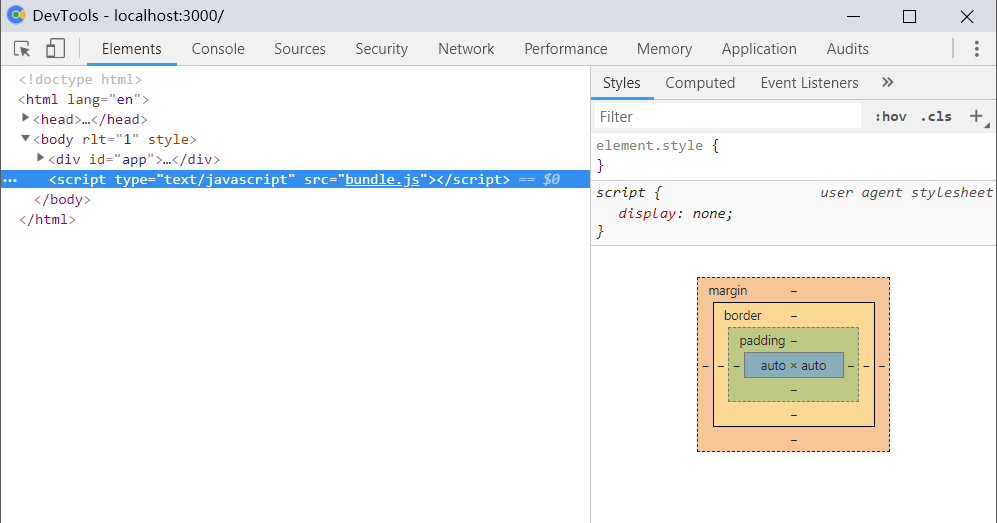
其实这个插件最重要的一点是,我们执行 npm run build 编译项目的时候,html-webpack-plugin 还会帮我们把处理好的 index.html 文件放入 dist 目录中。
webpack 处理 css
webpack 会自动处理 main.js 中通过 import 引入的其他 JavaScript 代码,同样也可以处理通过 import 引入的 css 样式文件,不过需要使用专门的 css-loader 来进行处理。我们需要先安装打包处理 css 文件的两个包:style-loader 和 css-loader
1 | cnpm install style-loader css-loader --save-dev |
现在 webpack 还不认识 css 文件,还需要修改 webpack.config.js 增加处理 css 文件的规则,修改后配置文件内容如下:
1 | const path = require('path') |
其中新添了 module 配置项,并在其中添加了 rules。每一条规则都是一个对象格式,其中 test 是正则表达式,用于匹配以 .css 结尾的文件,use 配置了使用哪些加载器来处理匹配到的文件,加载器是从后往前处理的,css 文件先通过 css-loader 处理,然后才经过 style-loader 处理。
接着在 src 目录下新建 css 文件夹用于存放公共的 css 样式文件。css 目录中创建 base.css 文件来编写一些基础样式,文件内容如下:
1 | * { |
接着在 main.js 里引入这个样式文件:
1 | import './css/base.css' |
由于更改了 webpack 的配置文件,所以需要重启 webpack-dev-server,然后浏览器查看效果:
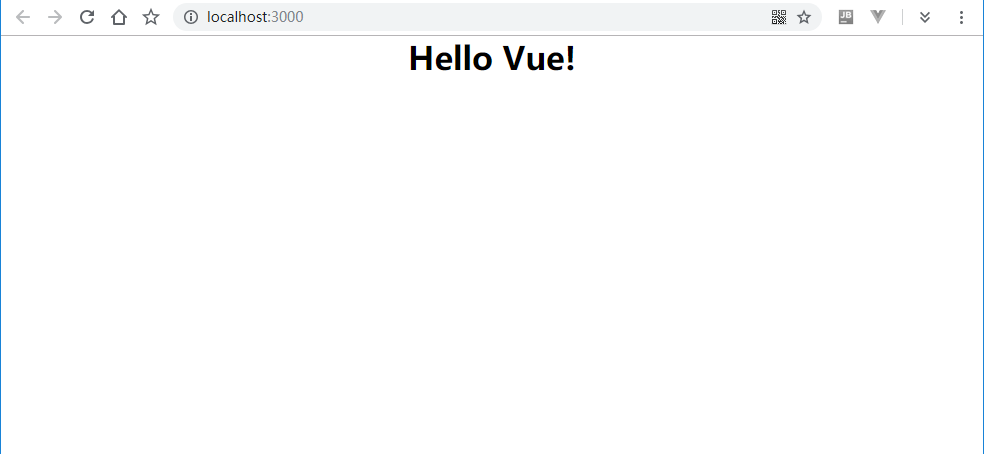
样式成功引入了。
webpack 中使用 less
对于习惯用 less 的语法来写 css 的开发者,webpack 也提供了相应的加载器可以很方便的处理 less 代码。我们首先需要安装 less 的编译器以及 less 的加载器:
1 | cnpm install less less-loader --save-dev |
然后 rules 规则中添加对 less 文件的处理:
1 | module: { |
css 目录中编写 base.less 文件:1
2
3
4
5
6@baseColor: blue;
div {
h1 {
color: @baseColor;
}
}
然后 main.js 中引入这个文件:1
2
3
4
5import './css/base.css'
import './css/base.less'
let app = document.getElementById("app")
app.innerHTML = "<h1>Hello Vue!<h1>"
重启 webpack-dev-server,浏览器查看效果:

webpack 中使用 sass
webpack 处理 sass 语法编写的文件和 less 原理相同,不过由于 sass 是通过 ruby 写的编译器,通过 npm 安装会非常麻烦,而通过 cnpm 就非常容易了。同样先安装 sass 的编译器和加载器:
1 | cnpm install node-sass sass-loader --save-dev |
webpack 配置文件中添加处理 .scss 文件的规则:
1 | module: { |
css 目录中编写 base.scss 文件:
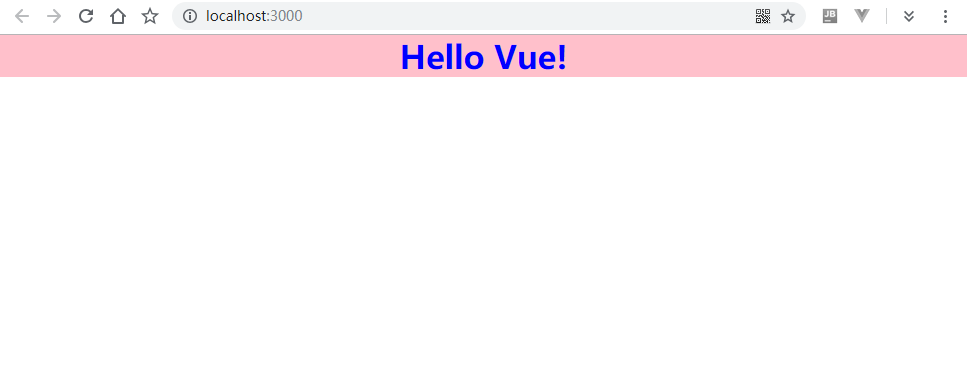
1 | $baseColor: pink; |
main.js 引入这个文件:
1 | import './css/base.css' |
重启 webpack-dev-server,浏览器查看效果:
webpack 处理其他资源
css 中经常会引入一些背景图片、字体图标等文件,如果 webpack 不对这些文件也进行处理,那网页还是会出问题的。用 webpack 打包小图片和小图标还可以完美的解决客户端和浏览器因为传输小图片造成的 HTTP 资源浪费问题。之前我们解决这种问题通常是采用精灵图的方式。
处理这些资源我们需要安装 url-loader,它又依赖于 file-loader:
1 | cnpm install url-loader file-loader --save-dev |
处理背景图片
同处理 css 文件的过程,我们也需要在 webpack 配置文件中增加处理图片文件的规则:
1 | module: { |
在 src 目录下创建 images 目录
现在我们给网页增加一个背景图:
将背景图保存为 bg.png,并放入 src/images 目录中,然后修改 base.css 中引入这个图片作为背景:
1 | * { |
重启 webpack-dev-server 后,页面背景图被成功加载了。
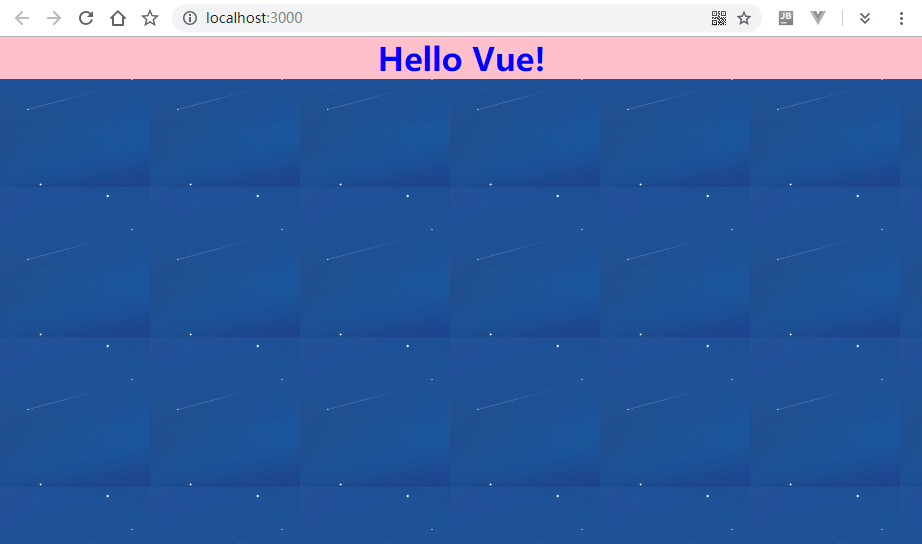
这些图片 webpack 是如何处理的呢?我们不妨 F12 开发者模式查看下:
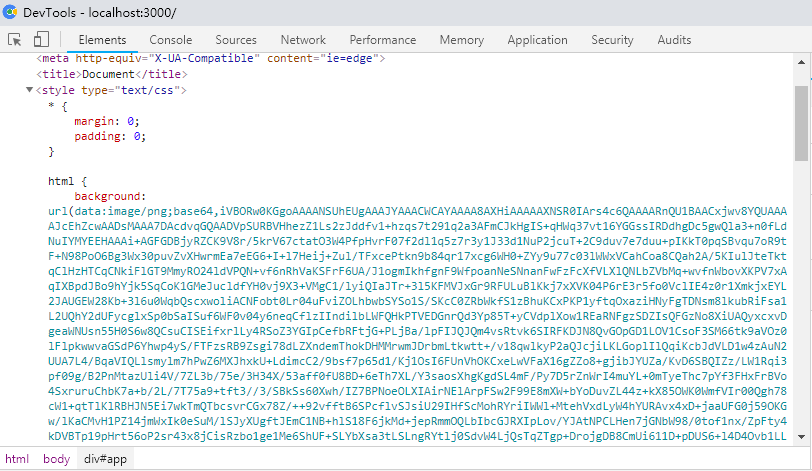
webpack 将图片以 Base64 的编码格式直接写入了 css 样式中,这样浏览器就不需要再次发起一次对图片的 HTTP 请求了。Base64 编码也有个不足的地方是,编码后的文件比源文件要增大三分之一,如果是小文件,Base64 的优势还是非常明显的,但是如果图片尺寸非常大,那带来的额外网络资源消耗就非常不划算了。我们可以通过给 url-loader 插件进行传参,来手动控制将多大尺寸的图片进行 Base64 编码。
修改 webpack 配置文件,我们用 get 请求传参的方式给 url-loader 传递参数:
1 | module: { |
这表示只有小于 8192 字节的图片,我们才需要进行 Base64 编码。图片的大小是 13.4K 明显超过了限制。重启 webpack-dev-server 查看效果:
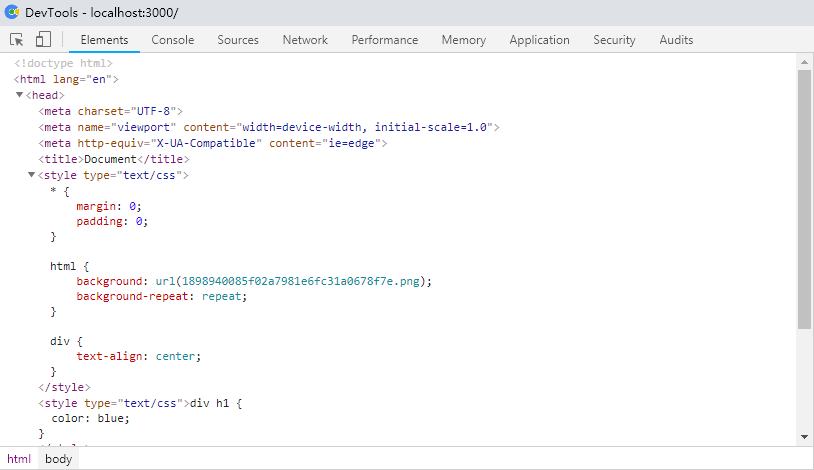
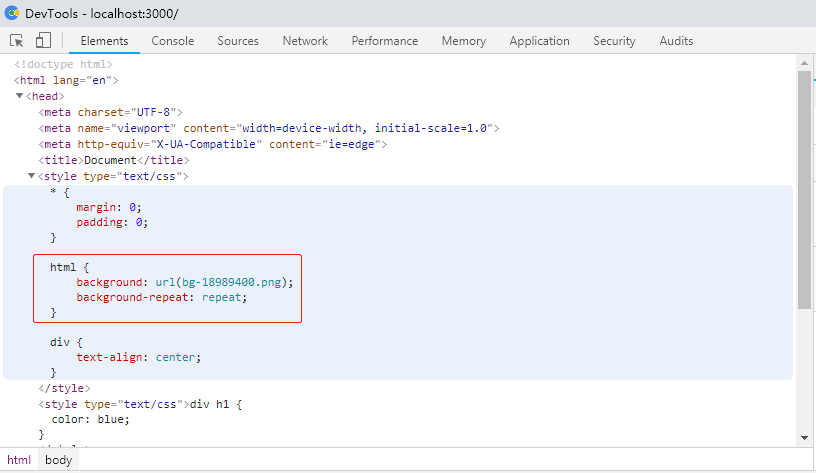
现在文件名是一个32位的哈希值来表示,这样做的好处是可以避免如果项目中有内容完全相同的文件,就不需要处理两次了。当然这个名字的结构我们也是可以自定义的:
1 | module: { |
我们将文件的原名称放在第一位,后面紧跟8位的哈希值,后面带上原来的扩展名,修改 webpack 配置文件后并重启 webpack-dev-server:
处理字体图标文件
一些 css 样式库自带了图标以及字体文件,比如 Bootstrap,如果我们不对这些资源进行处理的话,页面也是无法正常显示的,下面就使用 Bootstrap 试试图标字体该如何处理。
首先安装 bootstrap:
1 | cnpm install bootstrap@3 --save |
由于我们只使用 Bootstrap 提供的样式,所以就不引入 jquery 等依赖了。
修改 webpack 配置文件,添加处理图标字体的规则:
1 | module: { |
在 main.js 中引入 bootstrap.css 并向 div 元素中追加一个图标:1
2
3
4
5
6
7
8
9
10
11import './css/base.css'
import './css/base.less'
import './css/base.scss'
import '../node_modules/bootstrap/dist/css/bootstrap.css'
let app = document.getElementById("app")
app.innerHTML = "<h1>Hello Vue!<h1>"
let icon = document.createElement('i')
icon.className = "glyphicon glyphicon-music"
app.appendChild(icon)
重启 webpack-dev-server:
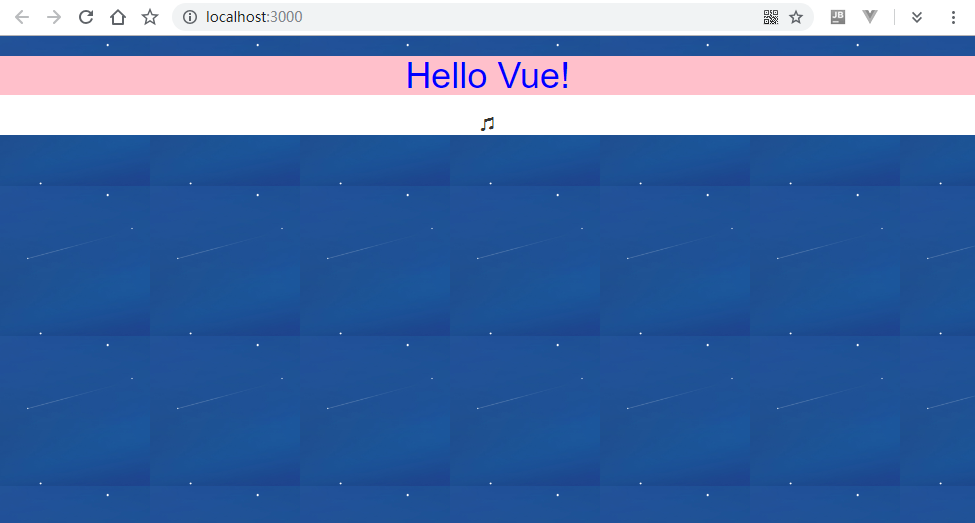
小小的图标出现了。
webpack 中 babel 配置
webpack 虽然支持一部分 ES6 语法,但是我们还是无法放开了写 ES6 语法的。这时我们就需要一款工具,来自动帮我们把高版本的 JavaScript 语法转变为较低版本的,这样对于 webpack 和浏览器兼容性都比较好,而且我们也可以享受 ES6 甚至更高版本的语法带来的编程体验。这款工具就叫做 Babel。
安装 Babel 需要两套包:1
2cnpm install babel-core@6 babel-loader@7 babel-plugin-transform-runtime --save-dev
cnpm install babel-preset-env babel-preset-stage-0 --save-dev
接着修改 webpack 配置文件,让 .js 文件先通过 Babel 进行处理:
1 | module: { |
这里通过 babel-loader 对 js 文件进行处理,并排除了 node_modules 中的 js 文件。如果不排除 node_modules,Babel 会将其中的所有 js 文件都打包编译,这样可能照成很多无法预料的结果,这显然不是我们希望的。
到这一步还没有结束,我们还需要给 Babel 提供一个配置文件,告诉 Babel 编译 js 文件的一些配置。配置文件名称是 .babelrc,文件内容格式是 JSON。
在项目主目录下创建 .babelrc 文件,并写入如下内容:
1 | { |
可以看到配置文件的内容和之前安装的几个包是相关的,其中 plugins 里放的就是之前安装的 babel-plugin-transform-runtime。而 presets 里的东西就更厉害了,如果我们要编译不同语法的 js 代码,比如 React 的 jsx 语法,ES6 甚至 ES7/8 的语法,就需要使用 babel-presets-* 相对应的包了。这些包里包含了不同标准代码的转码规则。
接下来修改 main.js 添加一些 ES6 才支持的语法:
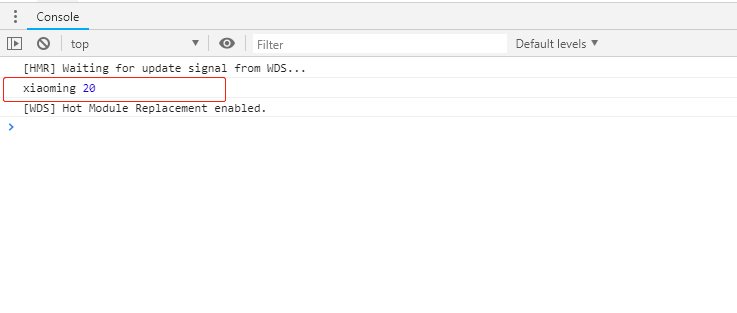
1 | import './css/base.css' |
重启 webpack-dev-server,打开浏览器开发者选项,可以看到我们用 class 定义的类,并调用类里静态方法的代码执行成功了。
文件总结
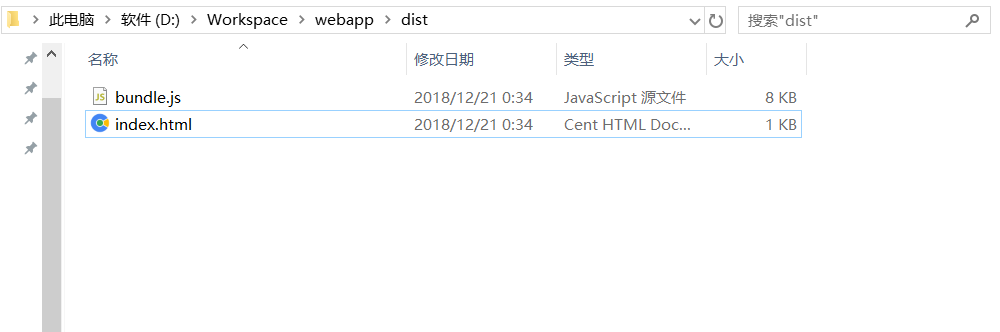
现在的目录树是:
webapp
├── dist
│ ├── bundle.js
│ └── index.html
├── node_modules ...
├── src
│ ├── css
│ │ ├── base.css
│ │ ├── base.less
│ │ └── base.scss
│ ├── images
│ │ └── bg.png
│ ├── index.html
│ └── main.js
├── .babelrc
├── package.json
└── webpack.config.js
文件内容:
base.css:1
2
3
4
5
6
7
8
9
10
11
12
13* {
margin: 0;
padding: 0;
}
html {
background: url(../images/bg.png);
background-repeat: repeat;
}
div {
text-align: center;
}
base.less:1
2
3
4
5
6@baseColor: blue;
div {
h1 {
color: @baseColor;
}
}
base.scss:1
2
3
4
5
6$baseColor: pink;
div {
h1 {
background-color: $baseColor;
}
}
index.html:1
2
3
4
5
6
7
8
9
10
11
12
<html lang="en">
<head>
<meta charset="UTF-8">
<meta name="viewport" content="width=device-width, initial-scale=1.0">
<meta http-equiv="X-UA-Compatible" content="ie=edge">
<title>Document</title>
</head>
<body>
<div id="app"></div>
</body>
</html>
main.js:1
2
3
4
5
6
7
8
9
10
11
12
13
14
15
16
17
18
19import './css/base.css'
import './css/base.less'
import './css/base.scss'
import '../node_modules/bootstrap/dist/css/bootstrap.css'
let app = document.getElementById("app")
app.innerHTML = "<h1>Hello Vue!<h1>"
let icon = document.createElement('i')
icon.className = "glyphicon glyphicon-music"
app.appendChild(icon)
class Person{
static info = {name: "xiaoming", age: 20}
static show(){
console.log(Person.info.name, Person.info.age)
}
}
Person.show()
.babelrc:1
2
3
4
5
6
7
8
9{
"presets": [
"env",
"stage-0"
],
"plugins": [
"transform-runtime"
]
}
package.json:1
2
3
4
5
6
7
8
9
10
11
12
13
14
15
16
17
18
19
20
21
22
23
24
25
26
27
28
29
30
31
32
33
34
35
36{
"name": "webapp",
"version": "1.0.0",
"description": "",
"main": "index.js",
"scripts": {
  "test": "echo \"Error: no test specified\" && exit 1",
  "build": "webpack --mode production",
  "dev": "webpack-dev-server"
},
"keywords": [],
"author": "",
"license": "ISC",
"devDependencies": {
"babel-core": "^6.26.3",
"babel-loader": "^7.1.5",
"babel-plugin-transform-runtime": "^6.23.0",
"babel-preset-env": "^1.7.0",
"babel-preset-stage-0": "^6.24.1",
"css-loader": "^2.0.1",
"file-loader": "^3.0.1",
"html-webpack-plugin": "^3.2.0",
"less": "^3.9.0",
"less-loader": "^4.1.0",
"node-sass": "^4.11.0",
"sass-loader": "^7.1.0",
"style-loader": "^0.23.1",
"url-loader": "^1.1.2",
"webpack": "^4.28.0",
"webpack-cli": "^3.1.2",
"webpack-dev-server": "^3.1.10"
},
"dependencies": {
"bootstrap": "^3.4.0"
}
}
webpack.config.js:1
2
3
4
5
6
7
8
9
10
11
12
13
14
15
16
17
18
19
20
21
22
23
24
25
26
27
28
29
30
31
32
33
34
35
36
37const path = require('path')
const webpack = require("webpack")
const htmlWebpackPlugin = require("html-webpack-plugin")
module.exports = {
entry: path.join(__dirname, './src/main.js'),
output: {
path: path.join(__dirname, "./dist"),
filename: "bundle.js"
},
mode: "development",
devServer: {
open: true,
port: 3000,
hot: true,
// contentBase: "src",
},
plugins: [
new webpack.HotModuleReplacementPlugin(),
new htmlWebpackPlugin({
template: path.join(__dirname, "./src/index.html"),
filename: "index.html"
})
],
module: {
    rules: [
        {test: /\.css$/, use: ['style-loader', 'css-loader']},
        {test: /\.less$/, use: ['style-loader', 'css-loader','less-loader']},
        {test: /\.scss$/, use: ['style-loader', 'css-loader','sass-loader']},
        {   test: /\.(jpg|png|gif|bmg|jpeg)$/,
            use: ['url-loader?limit=8192&name=[name]-[hash:8].[ext]']
        },
        {test: /\.(ttf|eot|svg|woff|woff2)$/, use: 'url-loader'},
        {test: /\.js$/, use: 'babel-loader', exclude: /node_modules/}
    ]
}
}
webpack 与 Vue 的结合
安装 vue
这一步比较简单,直接用 cnpm 安装即可。
1 | cnpm install vue --save |
编写 Vue 代码
删除 main.js 原来的内容,新的内容如下:
1 | import Vue from "vue" |
并修改 index.html:
1 | <body> |
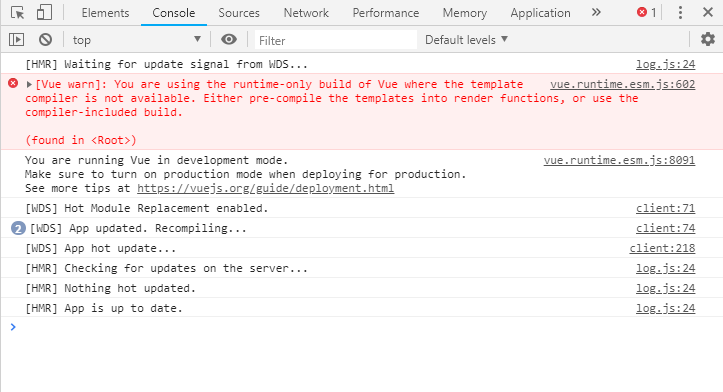
启动 webpack-dev-server 后,预料的 Hello Vue 并没有出现,打开浏览器控制台,这时出现了一个异常:
Vue 中的一个坑
为什么和我们直接在页面中通过 script 标签引入 vue.js 的结果不同呢?先来看 Vue 的警告是什么。
[Vue warn]: You are using the runtime-only build of Vue where the template compiler is not available.
Either pre-compile the templates into render functions, or use the compiler-included build.

(found in <Root>)
大致意思说,当前使用的是 Runtime Only 版本的 Vue,其中的模板编译器不可用,所以直接在 index.html 里写的模板字符串就没办法被编译了。解决方案也给了两个,要么预先将模板编译成 render 方法,要么使用包含编译器的 Vue.js 文件。
这是因为我们通过 import Vue from "vue" 导入的 Vue,是个精简版的 Vue…,把模板编译的功能给阉割了,所以模板字符串就没法被正常的替换了。可以查看 node_modules\vue\package.json 文件中 "main": "dist/vue.runtime.common.js",Vue 默认导出的是 dist/vue.runtime.common.js 这个文件。
我们可以在 main.js 中手动导入完整版的 vue.js 文件试试:
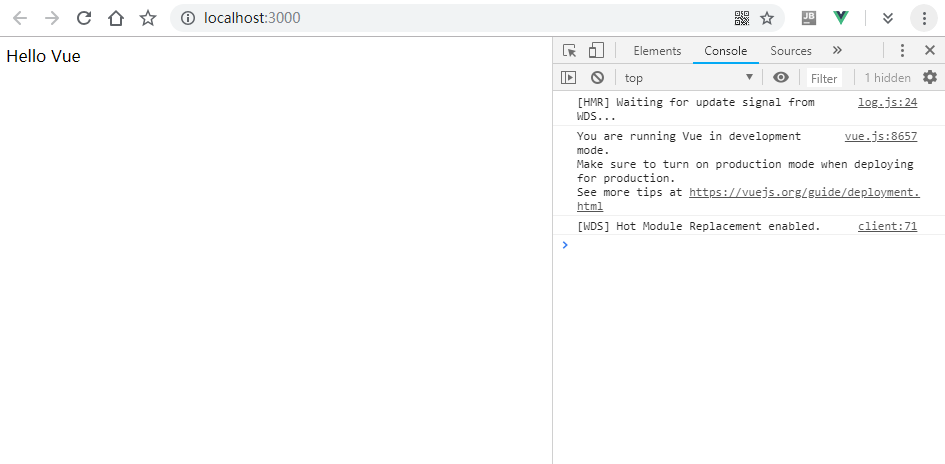
1 | import Vue from "vue/dist/vue.js" |
问题似乎是解决了:
但这并不是官方推荐的做法,否则 vue 的包不会默认导出不带编译器的 Runtime Only 版本了。在 vue 的包目录中,完整版的 vue.js 304K 的大小,而 vue.runtime.common.js 才 210K 大小。
Vue2 中的 template 模板会先经过模板编译器编译成 render 函数,最终都通过调用 render 函数将页面呈现出来。模板的编译功能可以离线进行,也可以在浏览器上进行。在浏览器上进行编译模板需要消耗更多的内存和CPU资源,所以离线编译模板会让页面的体验更佳。
如何使用 webpack 离线编译 Vue 模板,之后会讲到,下面先来看看如何使用 render 的方式渲染模板
使用 render 渲染模板
修改 main.js 的内容为如下:1
2
3
4
5
6
7
8
9
10
11
12
13
14
15
16
17import Vue from "vue/dist/vue.js"
let hello = {
template: "<h1>{{msg}}</h1>",
data(){
return {
msg:"Hello Render"
}
}
}
let vm = new Vue({
el: "#app",
render: function(createElement){
return createElement(hello)
}
})
修改 index.html 去掉模板字符串:1
2
3<body>
<div id="app"></div>
</body>
这里我们定义了一个新的 hello 模板,render 函数会接收一个方法,用这个方法可以将指定的模板渲染成 DOM 结构的对象(虚拟DOM),render 需要返回这个对象,然后这个对象被 Patch 到真实的 DOM 中(el: "#app")。
查看浏览器,页面被成功的渲染出来了:
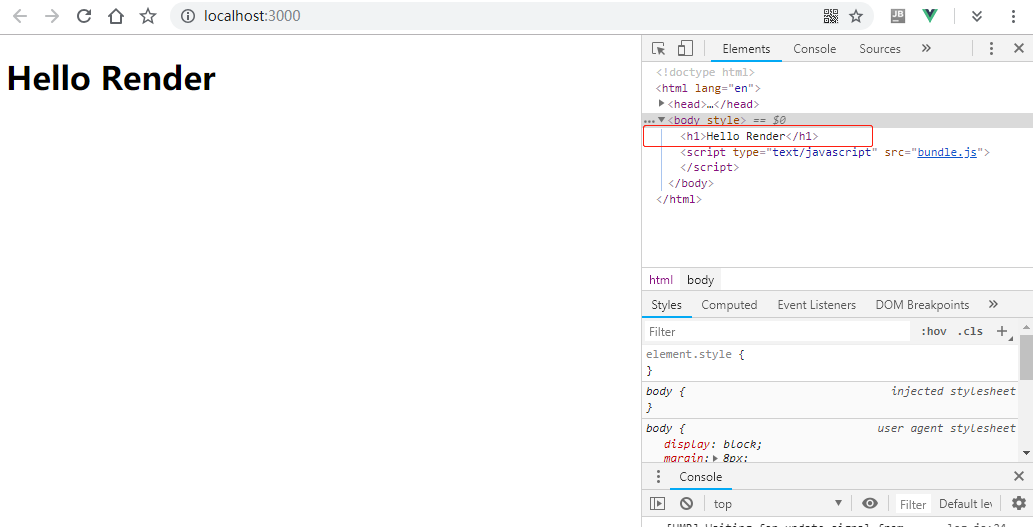
但结果似乎有个不太一样的地方,我们用模板字符串或者使用 components 申明的子组件,都包含在 <div id="app"></div> 容器中,而使用 render 渲染的模板,却直接将 <div id="app"></div> 替换了!
使用 webpack 处理 vue 文件
官方推荐的做法是将 Vue 的所有模板都定义为组件,单独写入以 .vue 结尾的文件,然后使用 vue-loader 和 vue-template-compiler 将 .vue 模板文件都离线编译处理成 JavaScript 代码。这样自然就不需要使用完整版 Vue 自带的模板编译功能了。
接下来安装这两个包:1
cnpm install vue-loader vue-template-compiler --save-dev
修改 webpack 配置文件,引入 vue 插件,以及增加对 .vue 文件的处理规则:
1 | const path = require('path') |
src 目录下新建 App.vue 文件,然后写入如下内容:
1 | <template> |
main.js 中引入并渲染这个组件:1
2
3
4
5
6
7
8
9import Vue from "vue"
import App from "./App.vue"
let vm = new Vue({
el: "#app",
render: function(createElement){
return createElement(App)
},
})
重启 webpack-dev-server,Hello App! 成功的在页面显示了出来。
子组件使用
我们接着在 src 目录创建一个 components 目录用来保存子组件。
在 components 目录中创建 Login.vue 文件,并写入如下内容:
1 | <template> |
在 App.vue 中引入并使用这个组件:1
2
3
4
5
6
7
8
9
10
11
12
13
14
15
16
17
18
19
20
21
22
23<template>
<div id="app">
{{msg}}
<login></login>
</div>
</template>
<script>
import login from './components/Login.vue'
export default {
data(){
return {
msg: "Hello App!"
}
},
components:{
'login': login
}
}
</script>
<style>
</style>
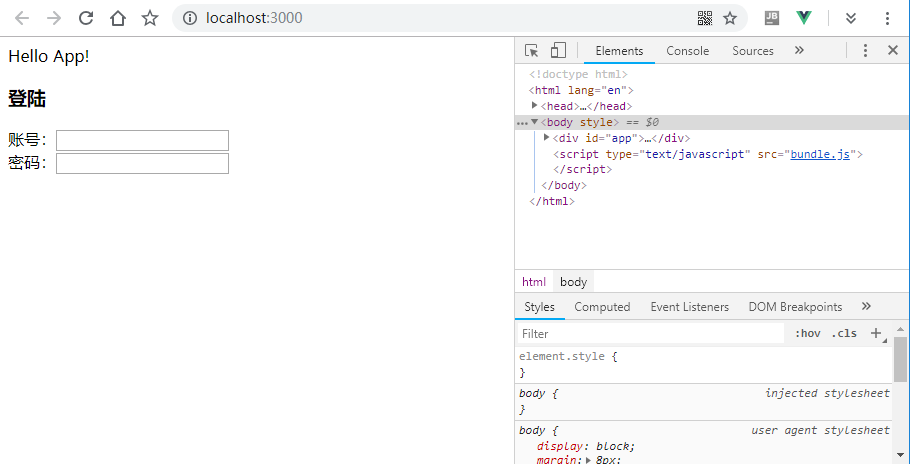
当前浏览器页面:
路由的使用
接下来使用路由来导航到其他组件,需要先安装 Vue 的路由模块:
1 | cnpm install vue-router --save |
在 components 目录中创建 Register.vue 文件,并写入如下内容:1
2
3
4
5
6
7
8
9<template>
<div>
<h3>注册</h3>
账号:<input type="text"><br>
密码:<input type="password"><br>
确认密码:<input type="password"><br>
<input type="submit" value="提交">
</div>
</template>
我们在 App.vue 中通过路由访问这两个组件:
1 | <template> |
然后在 src 目录下创建一个单独的 router.js 文件来存放路由配置信息:
1 | import Vue from 'vue' |
在 main.js 中应用这个路由:
1 | import Vue from "vue" |
浏览器查看效果:
vue 中使用 less
Vue 的样式写在模板文件的 style 标签中,并且可以给 style 标签使用 lang 属性来表明要使用的 css 语法。给 style 标签添加 scoped 属性可以让样式只对当前组件生效。
编辑 App.vue 的代码,内容如下:
1 | <template> |
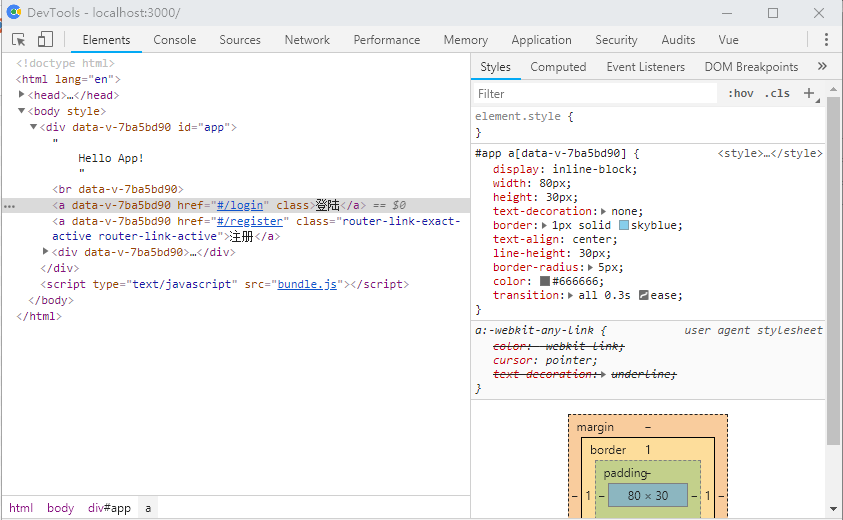
之前已经配置了 less 加载器,所以可以在页面上直接看到效果了:
Vue 是如何保证加上 scoped 属性的 style 标签只作用于当前的组件而不会影响其他组件呢?可以看到,Vue 自动给当前组件的所有标签都加上了 data-v-7ba5bd90 这个属性,这个属性就相当于每个组件的唯一标识。只要在样式中选择只给带有这个标识的标签应用样式,这样就做到各组件互不影响了。
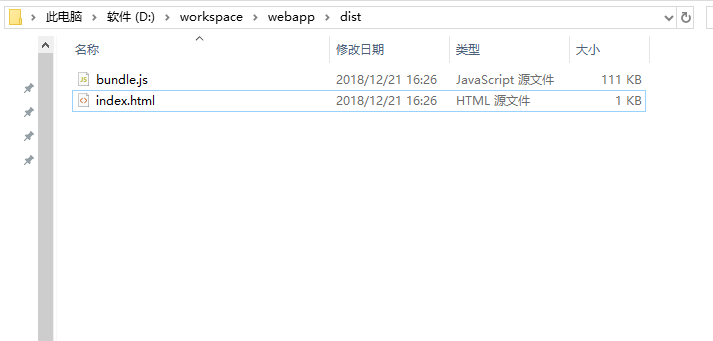
编译打包 Vue 项目
当项目完成后,就可以将项目编译测试部署了,下面运行 npm run build 将项目打包测试,最终我们生成了一个 111KB 的 bundle.js 文件,浏览器里打开 index.html 也测试无误。
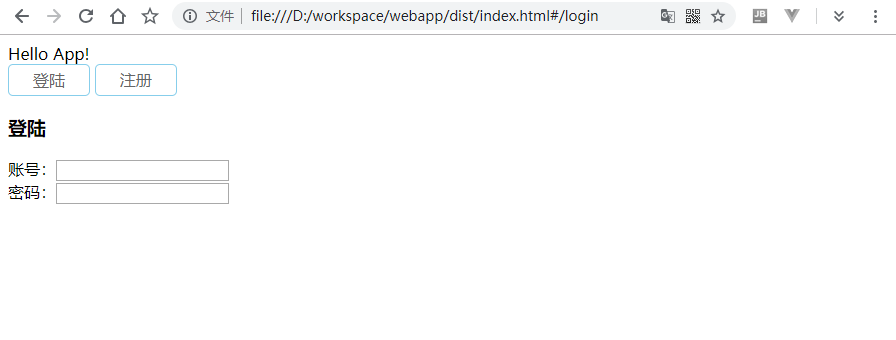
到这里 “从零开始搭建Vue开发环境” 就完成了。
当前项目目录树:
webapp
├── dist
│   ├── bundle.js
│   └── index.html
|── node_modules ...
├── src
│   ├── App.vue
│   ├── components
│   │   ├── Login.vue
│   │   └── Register.vue
│   ├── css
│   │   ├── base.css
│   │   ├── base.less
│   │   └── base.scss
│   ├── images
│   │   └── bg.png
│   ├── index.html
│   ├── main.js
│   └── router.js
├── .babelrc
├── package.json
└── webpack.config.js
附录
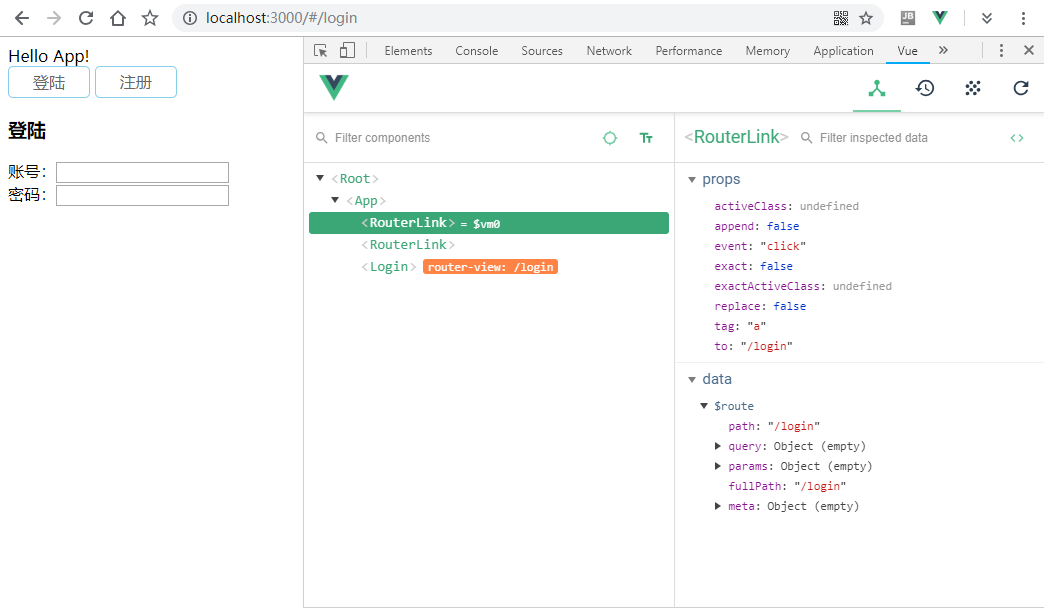
Chrome Vue 拓展
使用 Chrome 的 Vue 拓展插件,可以很方便的调试 Vue 项目,安装插件需要访问 Google 商店,安装地址:点击打开
使用效果:
项目文件打包下载
解压后进入 webapp 目录,执行 npm install 或者 cnpm install 安装依赖。